
Sometime while we were painting Sonya made a suggestion. “What if we made the entryway a nice tile pattern?”
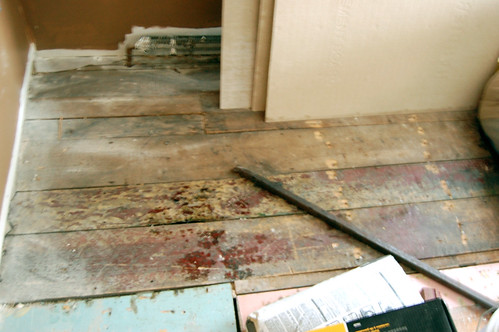
It sounded like a good idea to me. Before the renovation started the entryway was an odd mishmash: half was wooden boards, the other half linoleum. Not only did the two sides not match, they weren’t even on the same level – the wood was about a half inch taller. Neither side was level with the main floor in the room, either. But we thought, hey, at least laying tile on the strange split-level surface would give the entryway one consistent surface.
This project went beyond that original idea, but it ended up being one of the coolest new features here at Hidden Farm.
In pulling out the linoleum we finally figured out the cause of the two-level entryway: someone had installed big, heavy red tiles in the front section; the linoleum was on top of it. There was a patchwork of old wooden boards in the back, and the two heights didn’t match up. Why they were put in, I don’t expect we’ll ever know, but the good news was that both surfaces were removable. Trouble was, each new layer below had problems of its own, the biggest being that the floorboards nearest to the front door were showing signs of rot. Big signs, like Times Square sized. Fortunately the floor joists themselves were in good shape and completely level – or at least as level as it gets in this house.
So we bought a new hand-held sledge hammer, chisel and crowbar to carefully pull out the old tiles and boards. The lowest level of subfloor was held in by about 790 nails, most of which could only be removed by Sonya climbing into a creepy crawly part of the basement and hammering them back up. My job was to yank them out with the crowbar.
We were able to chisel some of the pieces out, but not for others because there were still more nails in the way. Those we had to cut out with a jigsaw, or bludgeon with the sledgehammer. Sometimes you use finesse, sometimes you use brute force. Whatever works.
After about three days of intermittent pulling, crowbar-ing, hammering, sledging and occasionally swearing, we got down to bare joists.
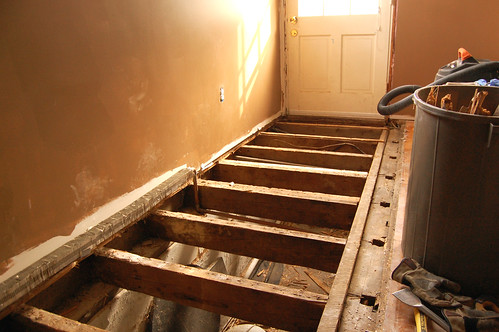
See those square holes to the right of the joists? Those are probably the post holes used for the house’s original frame – remember, the entryway was added on at some point.
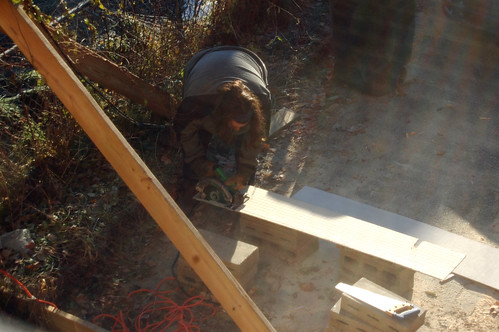
Now it was time to build back up. Sonya is much more trustworthy with the circular saw than I, so she cut thick stretches of plywood to fit a mostly-but-not-quite square area. Then she and baby Owen went for a walk while I hammered them in. Note to whoever owns the house in 100 years: I tried not to use 790 nails this time, so be grateful.
We put a layer of cement board on top of the wood subfloor, which makes the tile installation a lot easier. Again, Sonya did the cutting and I did the nailing.
Cement board is best installed with its own layer of adhesive, so I mixed up some thinset and laid it down with my trusty trowel. See how easily I pick up the lingo? That’s the only part of home improvement I pick up easily, but it’s something.
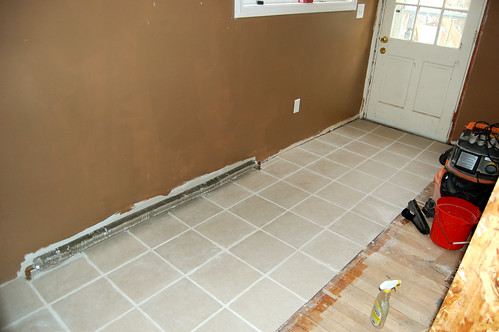
Installing the tile wasn’t as time consuming process as demolition, but it was definitely harder, We bought 12×12 tiles that matched our interior colors (walls and couch, anyway). The almost-but-not-quite-square layout meant we had to cut quite a few more tiles. I wouldn’t say Sonya took this job on with glee or gusto, but she did manage to get all the tiles in place over two evenings. She able to work around the not-straight lines and the baseboard heater to set a nice, solid flat tile surface.
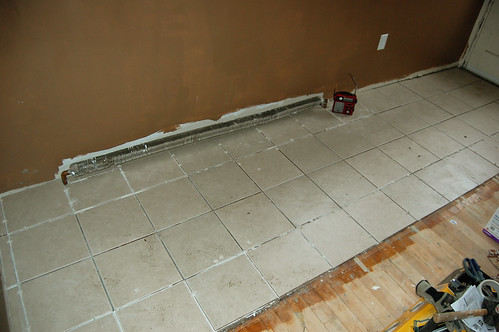
I wrapped things up, adding the grout and grout sealer while listening to reggae music (for whatever And with that, we finally have a (mostly) flat and (mostly) level entryway.
One more project down! This week is likely to be a big one, as the contractors would like to finish up all of their interior work by Friday. With any luck we’ll be moved into our new space by next weekend!